Manage Study Periods
Description
This functionality is used by the registrar department to manage study periods.
Prerequisites
- Login with your staff ID and password.
- Ensure that payment plans and payment plan installments have neem created. Click here to view more.
- Navigate to Maintenance > Registrar > Manage Study Periods.
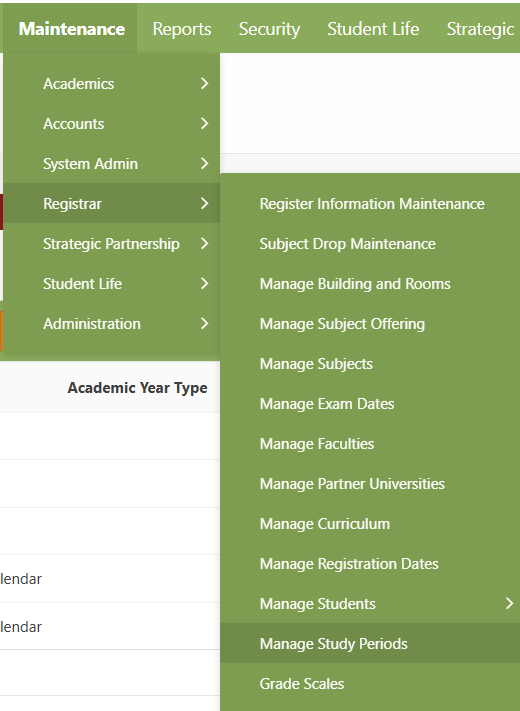
3. Wait for the page to reload and the Manage Study Periods page will be displayed.
Create Study Period
Ensure that all the prerequisites are met before continuing.
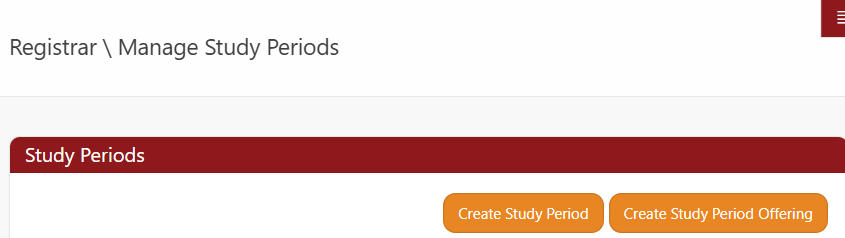
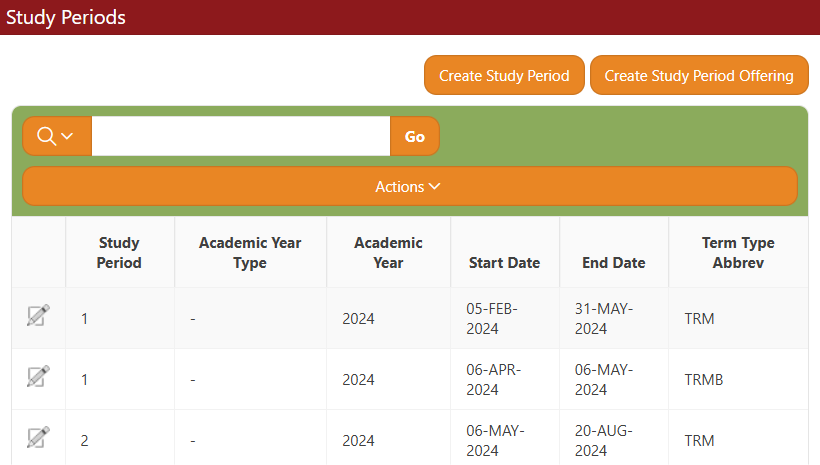
To Create a study period, click on the Create Study Period button in the top right corner of the Study Periods section as shown in the image above. Wait for the page to reload.
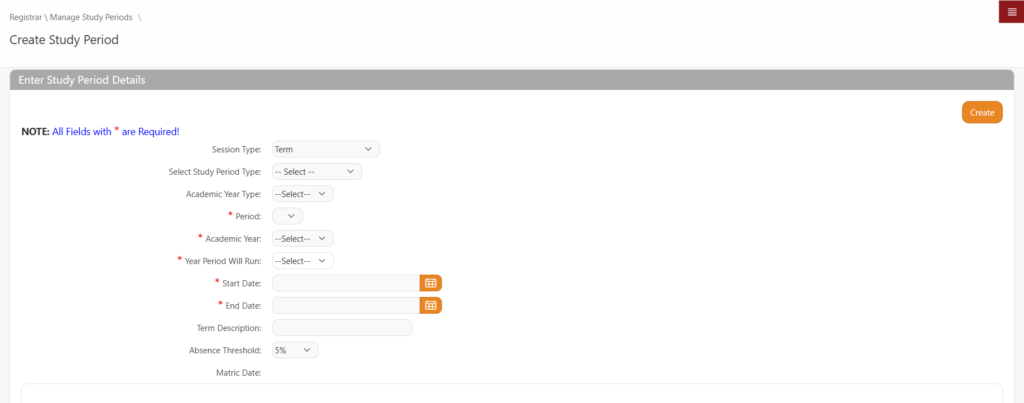
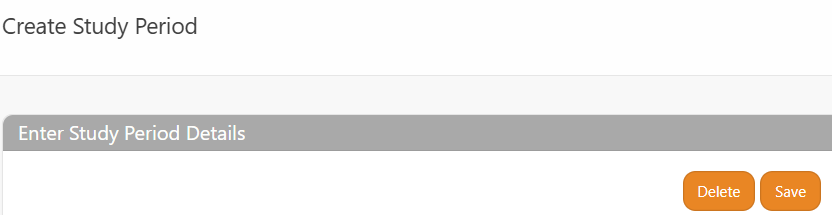
The Create Study Period page will be displayed with two regions i.e Enter Study Period Details and Account Details underneath, the two regions display forms respectively.
- Enter Study Period Details Form .

Special Processing
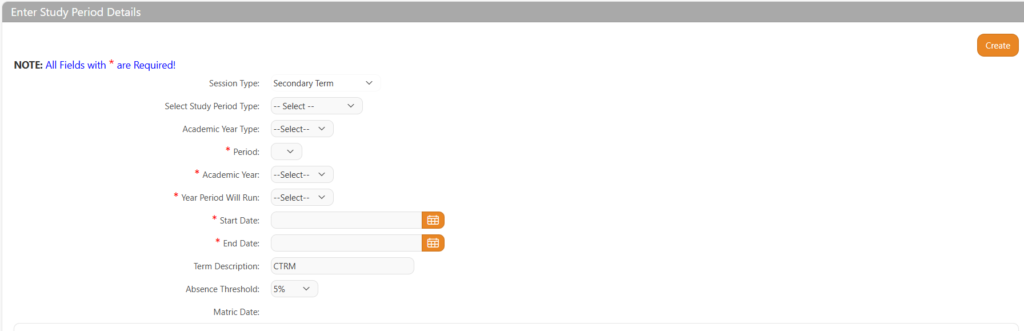
- Session Type: The session has the following types.
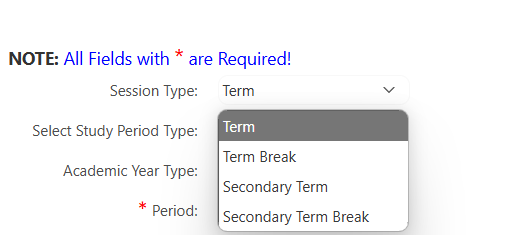
- Default Session Type.
- For Term Break
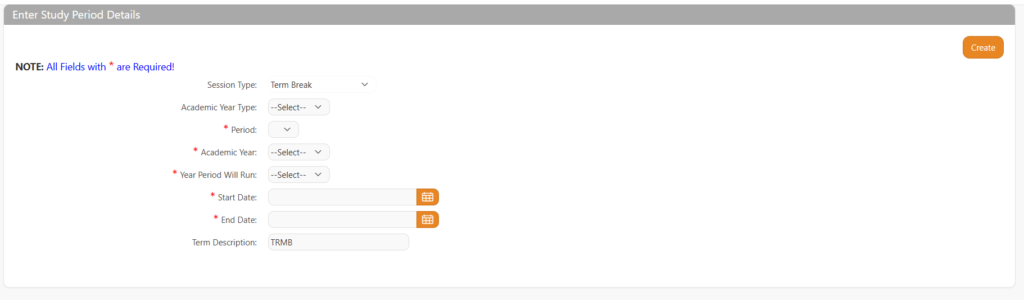
- Secondary Term
- Secondary Term Break
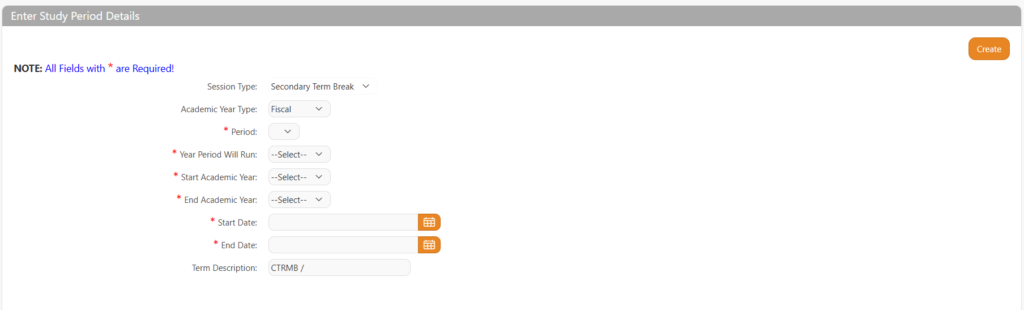
For all Term break and Secondary term break, there will be no need to enter any accounts details
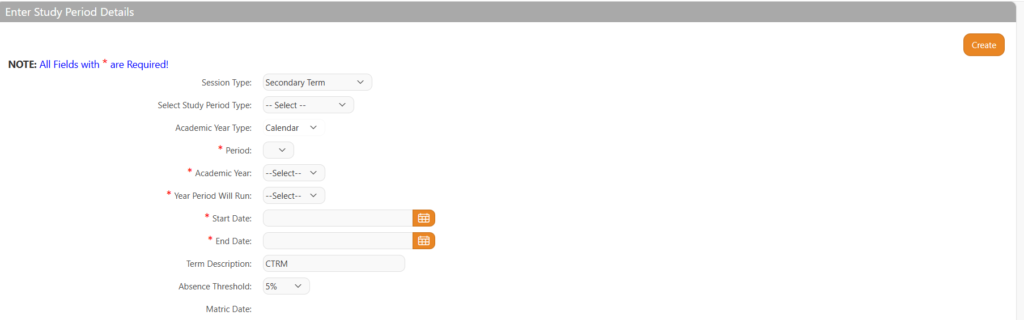
2. Academic Year Type
- Calendar :
- Fiscal:
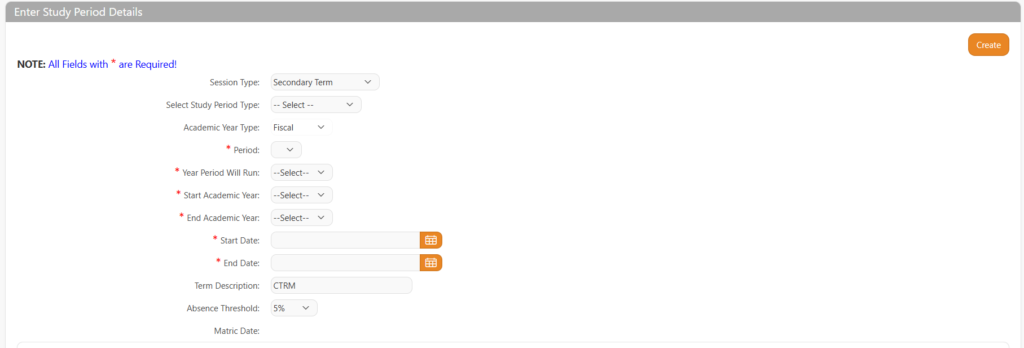
Note: Fiscal and Calander triggers different fields as shown from the images above.
2. Subject Billing Mode – For grouped mode, the user needs to provide a local and international school fee data as shown below:
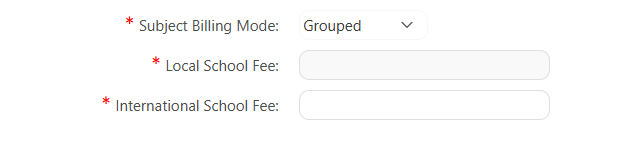
Alternatively, the user can choose either grade based or individually billing modes. For grade based and single mode the billing mode is calculated automatically.
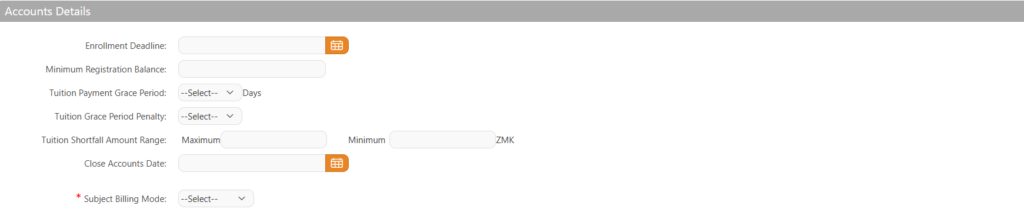
2. Account Details Form.
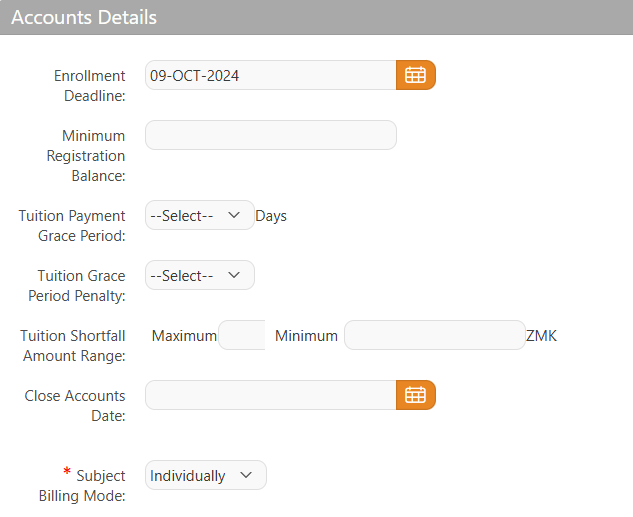
From the Enter Study Period Details region scroll down. The account details form has the following fields.
- Enrollment Deadline: This is the end date
- Minimum Registration Balance: Set the smallest amount to required to
initiate the registration process here.
- Minimum Registration Balance: Set the smallest amount to required to
- Tuition Payment Grace Period: Refers to the number of days accorded
as an extension to clear outstanding tuition
balances. Choose the number of days from
the dropdown menu. (If available)
- Tuition Payment Grace Period: Refers to the number of days accorded
- Tuition Grace Period Penalty: Refers to the fee that defaults in payment of
Tuition fees attracts. Choose the appropriate
percentage from the dropdown menu (Between
5 – 100%).
- Tuition Grace Period Penalty: Refers to the fee that defaults in payment of
- Tuition Shortfall Amount Range: This refers to the amount tuition fee acceptable to be accrued even after the
payment deadline. It is expressed in ZMK
owe the institution and maximum being the
highest value acceptable as outstanding.
- Tuition Shortfall Amount Range: This refers to the amount tuition fee acceptable to be accrued even after the
- Close Accounts Date: This is the end date of study periods account
processions. Choose a date from the calendar.
- Close Accounts Date: This is the end date of study periods account
- Subject Billing Mode: A study Period can be billed on an individual basis or
as per group.
- Subject Billing Mode: A study Period can be billed on an individual basis or
Not all the fields in the account details are mandatory with exception to Subject Billing Mode.
Once the accounts form has been populated, Scroll up and navigate to the Enter Study Period Details region. Click the Save button in the top right corner of this region (Enter Study Period Details).
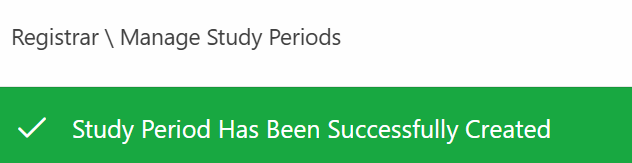
Wait for the page to reload. The data will be processed and saved to the database. Then, you will be redirected to the Registrar \ Manage Study Periods page with a status message as shown below.
If the fields in the form are not correct due to a format or data issue, an error message will be displayed providing details about what went wrong.
View Study Period
To view available study periods within the Study Periods section.
Simply, scroll down and you will see the available records.
Edit Study Period
To edit study periods, click on the pencil icon of the record you want to edit in the Study Period region a shown above. (if available)
Click it, then, wait for the page to reload.
The Enter Study Period Details section will appear on the Create Study Period page as shown below.
Within this section, you can modify the study period information in the forms provided.
Save changes by Clicking the Save button in the top right corner of the Enter Study Period Details region as shown in the image above.
The page will process and reload to the Registrar \ Manage Study Periods page with a success status message as shown below.